# Web Server Guide
This guide explains how to connect your CrossPoint Reader to WiFi and use the built-in web server to upload EPUB files from your computer or phone.
## Overview
CrossPoint Reader includes a built-in web server that allows you to:
- Upload EPUB files wirelessly from any device on the same WiFi network
- Browse and manage files on your device's SD card
- Create folders to organize your ebooks
- Delete files and folders
## Prerequisites
- Your CrossPoint Reader device
- A WiFi network
- A computer, phone, or tablet connected to the **same WiFi network**
---
## Step 1: Accessing the WiFi Screen
1. From the main menu or file browser, navigate to the **Settings** screen
2. Select the **WiFi** option
3. The device will automatically start scanning for available networks
---
## Step 2: Connecting to WiFi
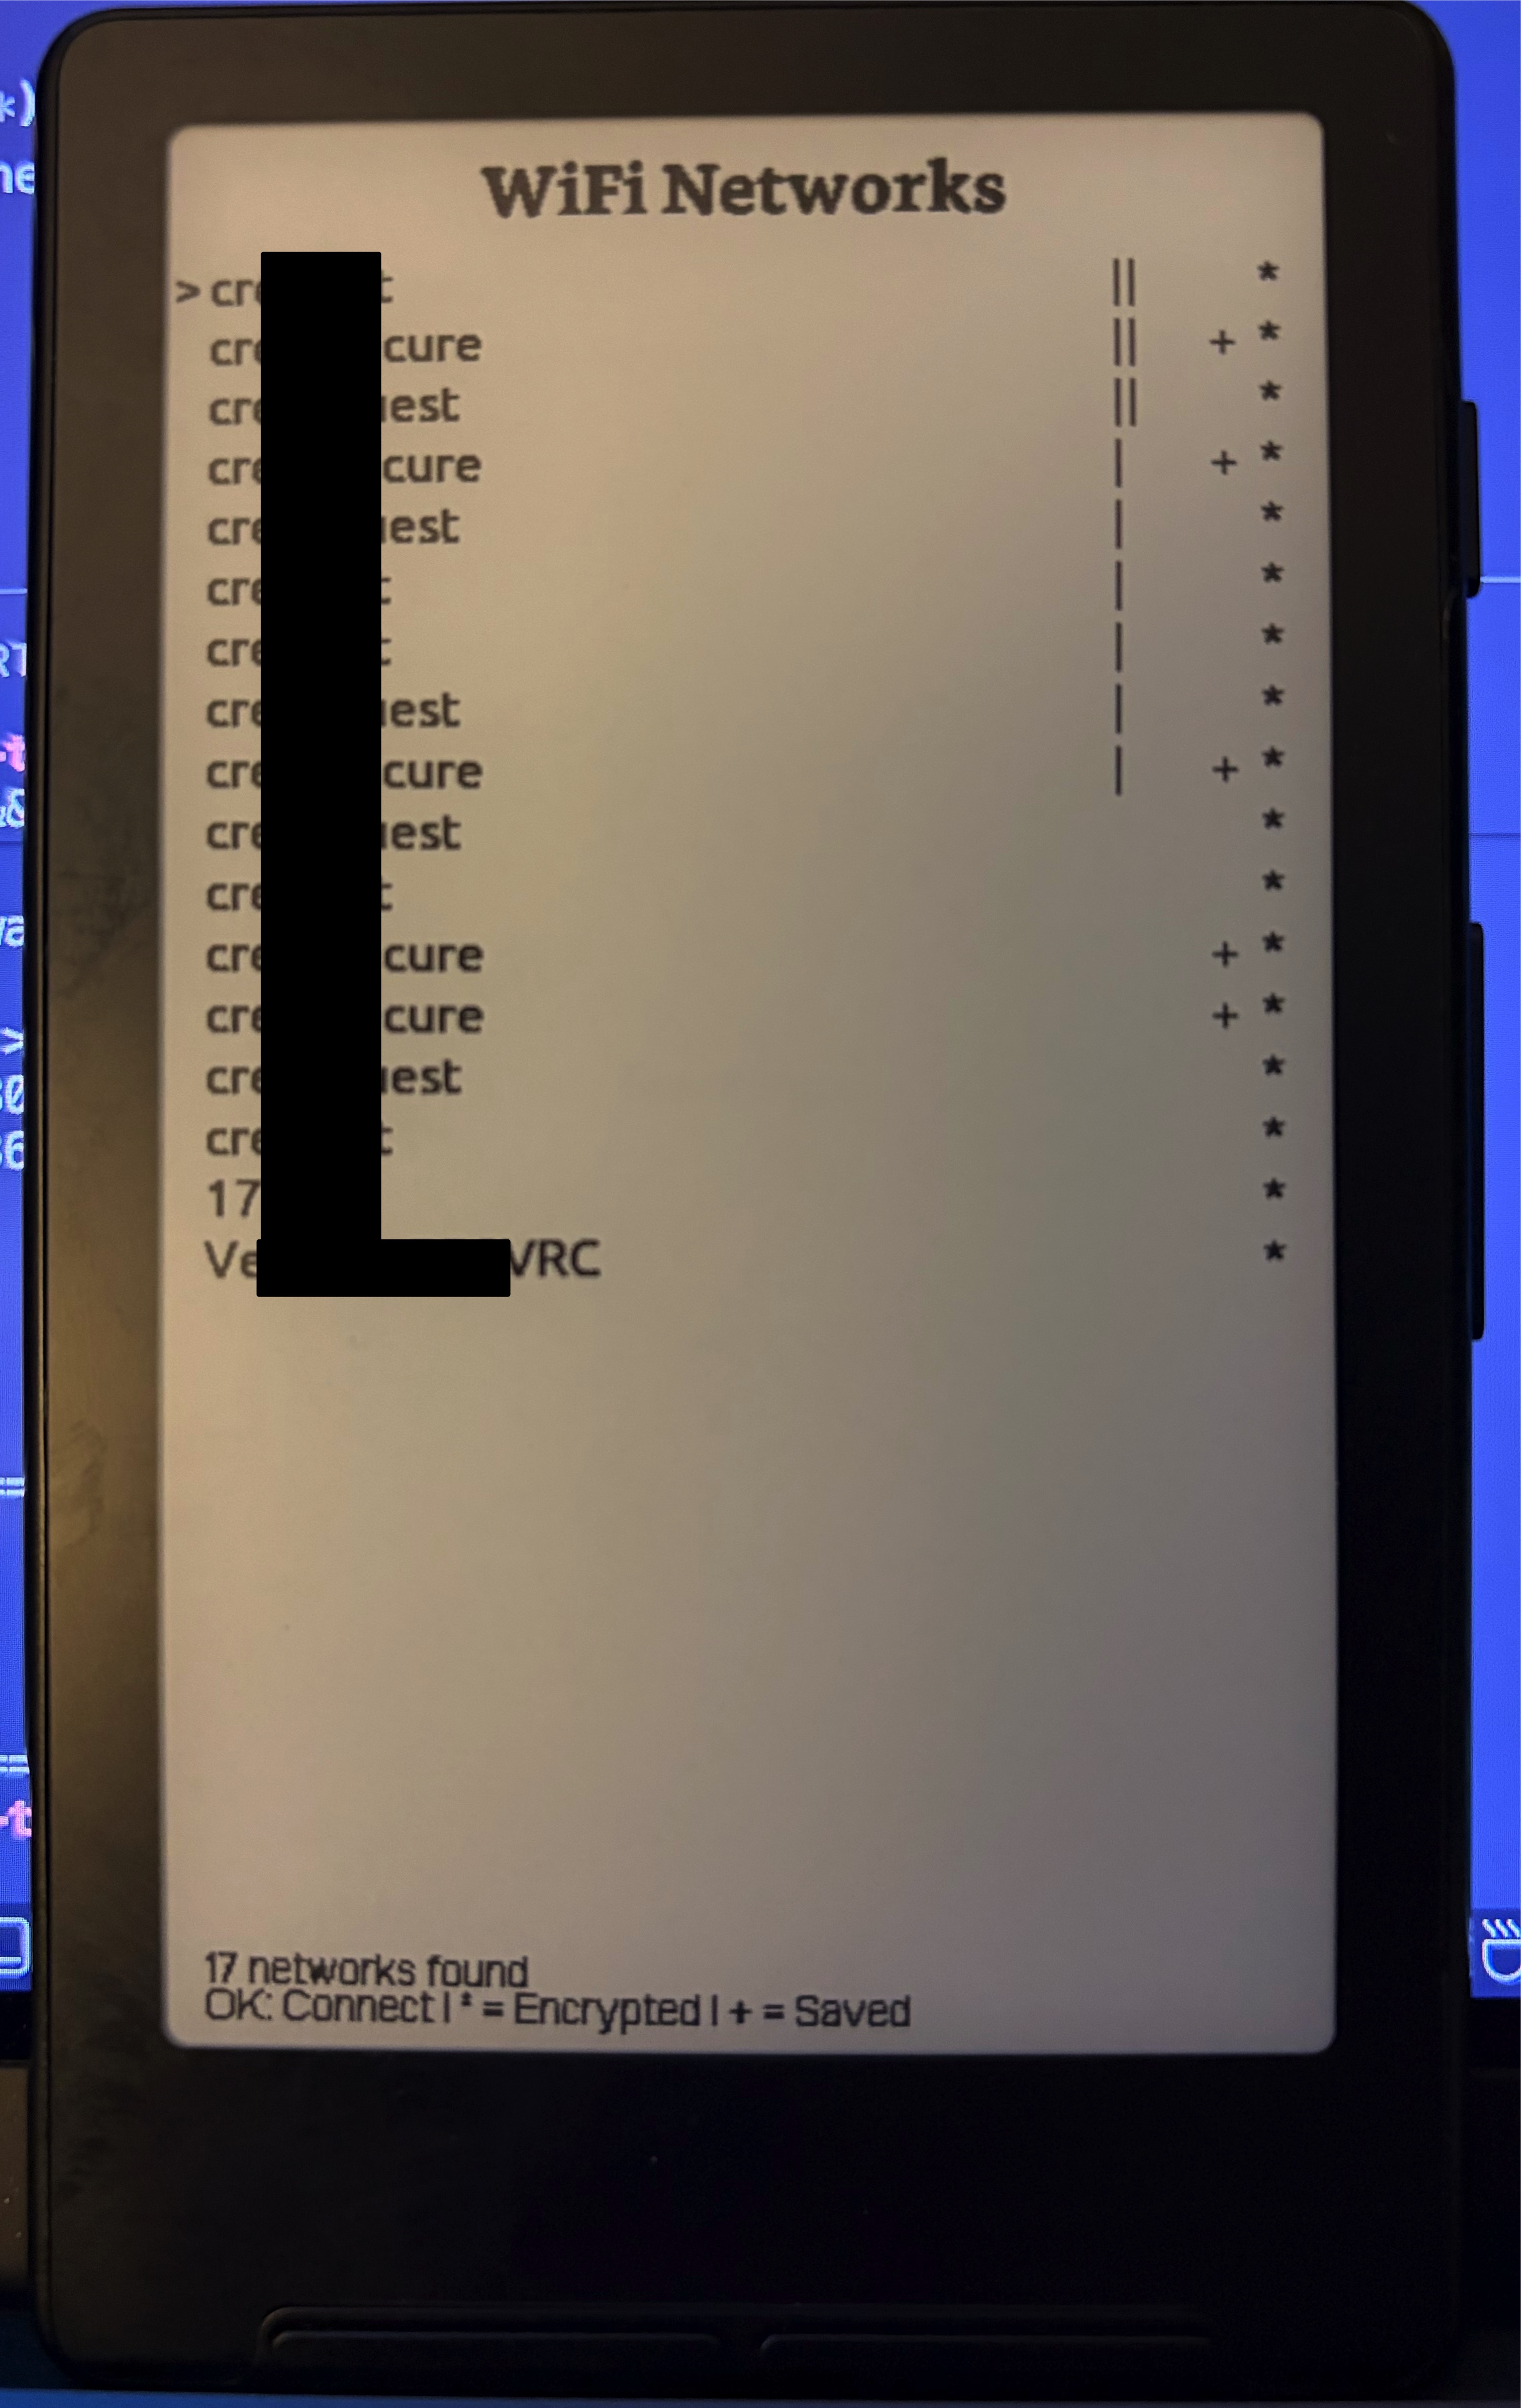
### Viewing Available Networks
Once the scan completes, you'll see a list of available WiFi networks with the following indicators:
- **Signal strength bars** (`||||`, `|||`, `||`, `|`) - Shows connection quality
- **`*` symbol** - Indicates the network is password-protected (encrypted)
- **`+` symbol** - Indicates you have previously saved credentials for this network
 ### Selecting a Network
1. Use the **Left/Right** (or **Volume Up/Down**) buttons to navigate through the network list
2. Press **Confirm** to select the highlighted network
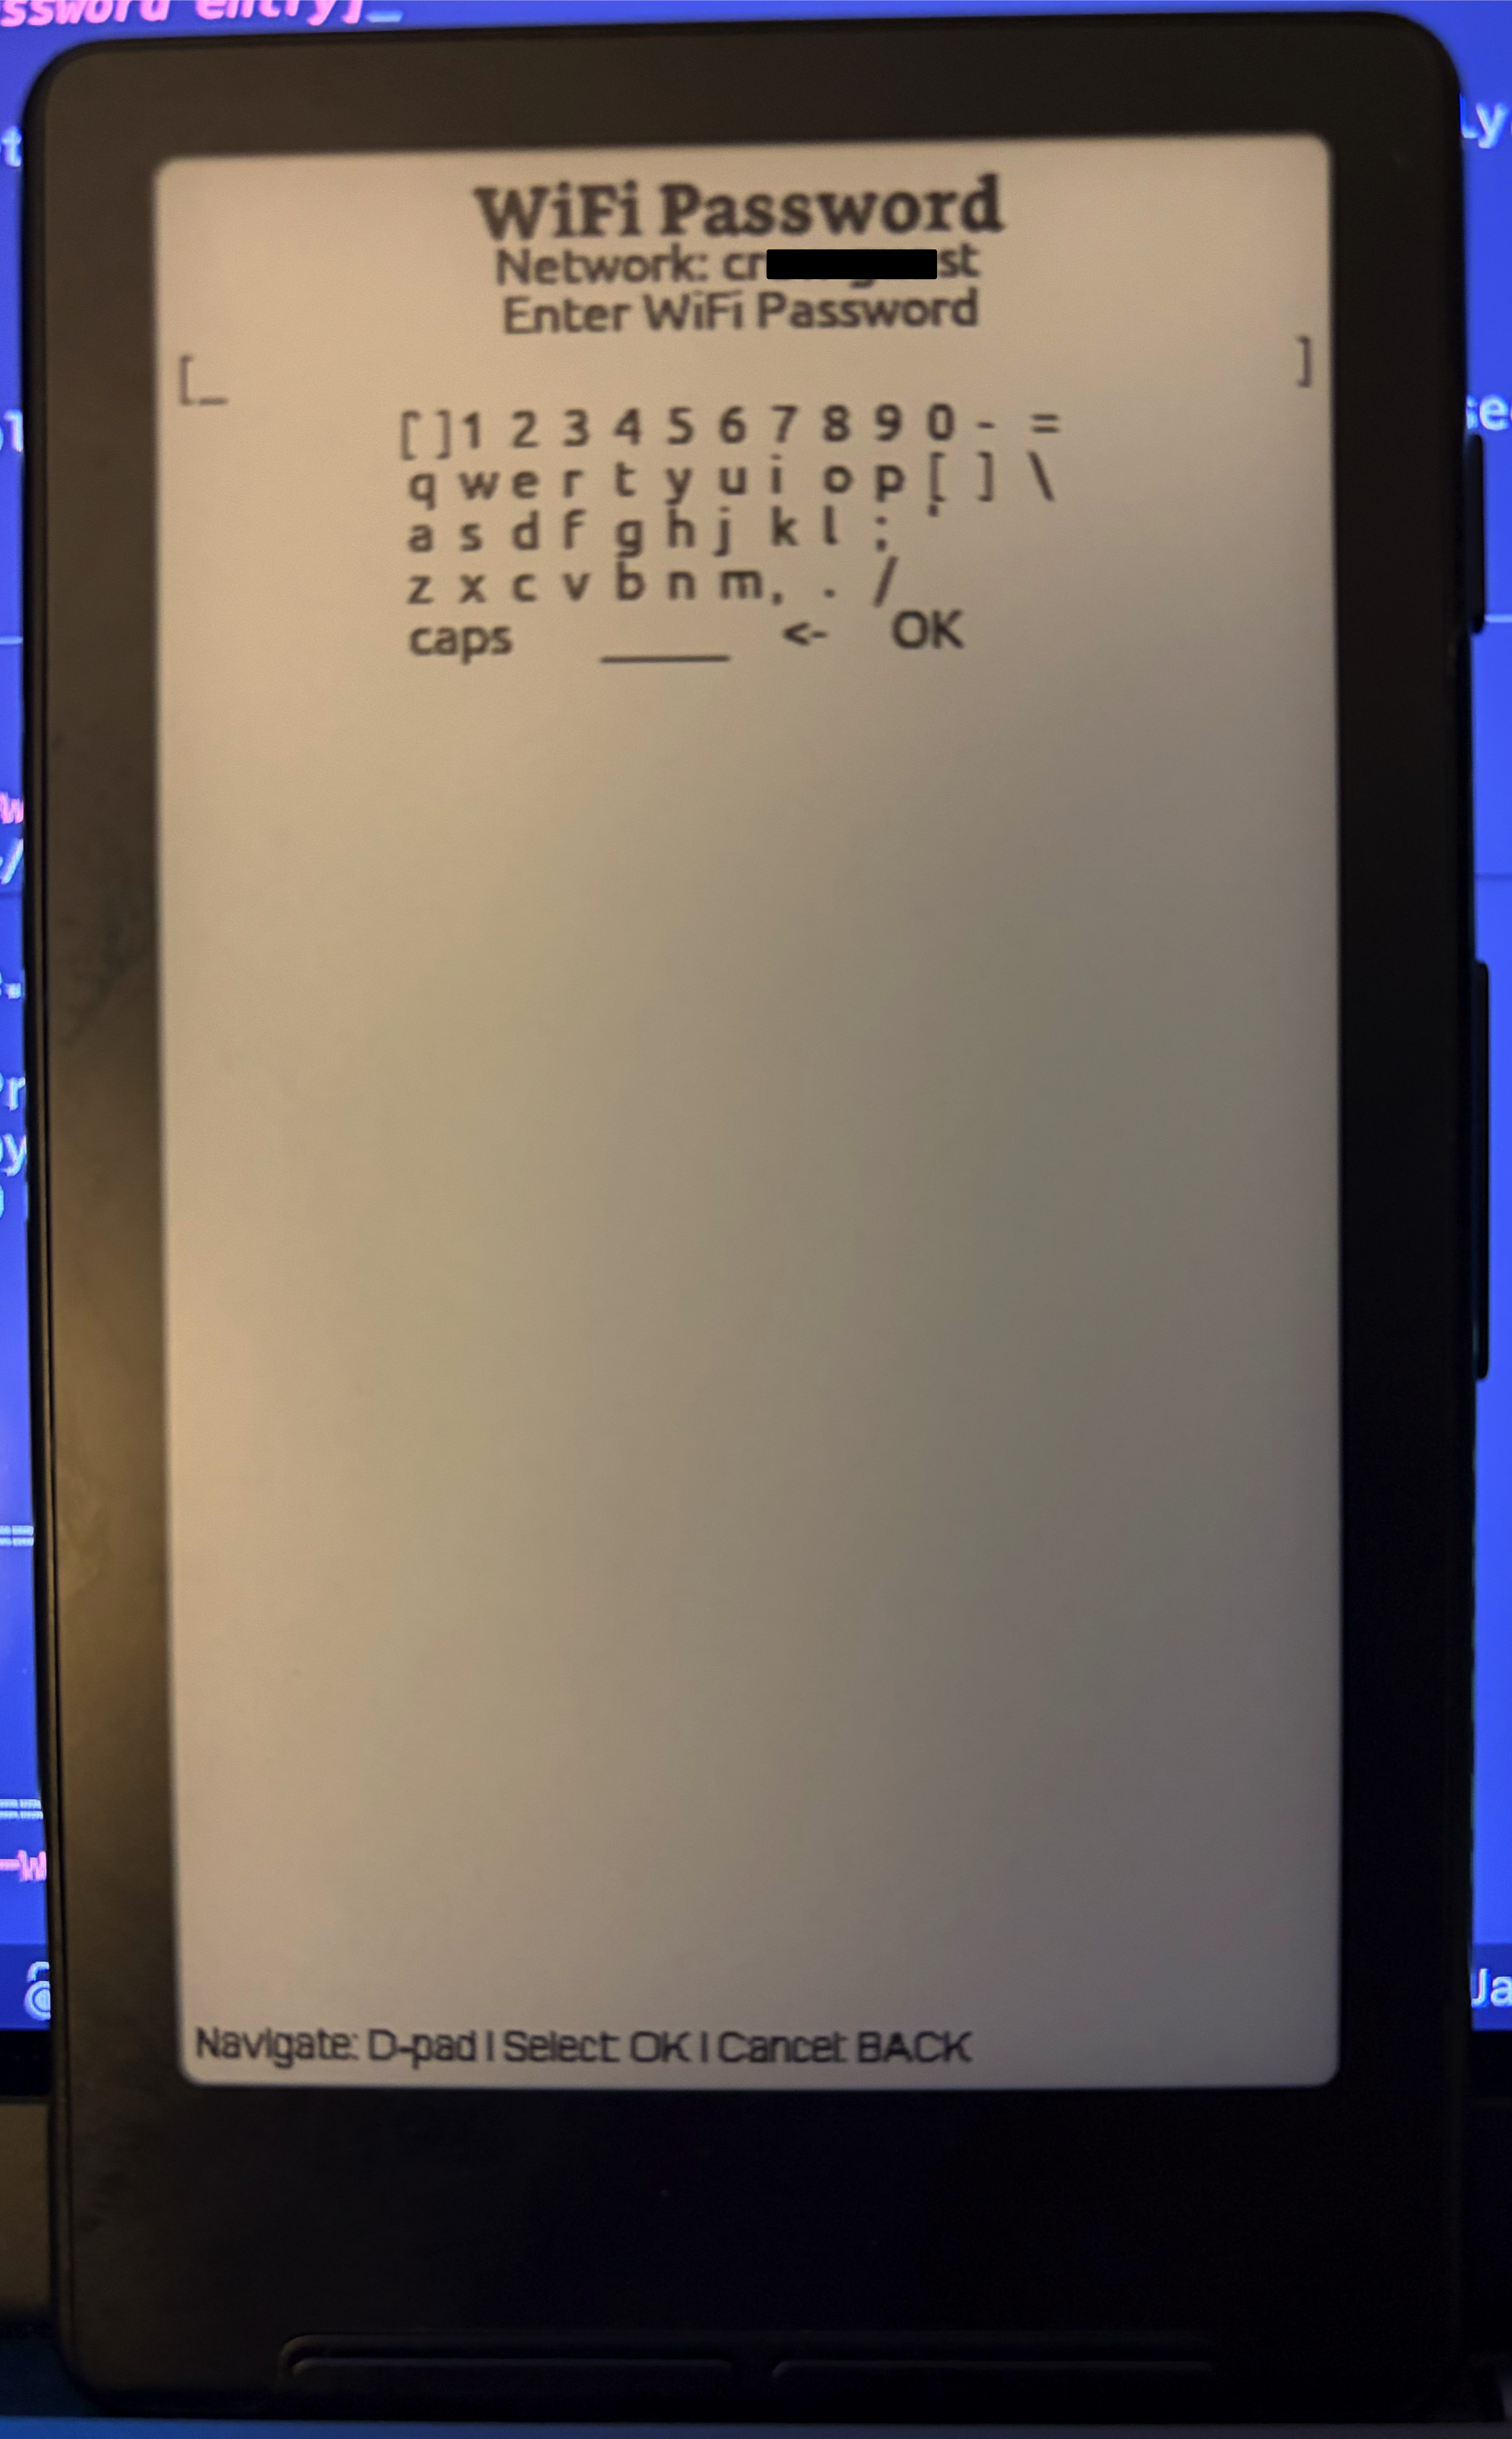
### Entering Password (for encrypted networks)
If the network requires a password:
1. An on-screen keyboard will appear
2. Use the navigation buttons to select characters
3. Press **Confirm** to enter each character
4. When complete, select the **Done** option on the keyboard
### Selecting a Network
1. Use the **Left/Right** (or **Volume Up/Down**) buttons to navigate through the network list
2. Press **Confirm** to select the highlighted network
### Entering Password (for encrypted networks)
If the network requires a password:
1. An on-screen keyboard will appear
2. Use the navigation buttons to select characters
3. Press **Confirm** to enter each character
4. When complete, select the **Done** option on the keyboard
 **Note:** If you've previously connected to this network, the saved password will be used automatically.
### Connection Process
The device will display "Connecting..." while establishing the connection. This typically takes 5-10 seconds.
### Saving Credentials
If this is a new network, you'll be prompted to save the password:
- Select **Yes** to save credentials for automatic connection next time (NOTE: These are stored in plaintext on the device's SD card. Do not use this for sensitive networks.)
- Select **No** to connect without saving
---
## Step 3: Connection Success
Once connected, the screen will display:
- **Network name** (SSID)
- **IP Address** (e.g., `192.168.1.102`)
- **Web server URL** (e.g., `http://192.168.1.102/`)
**Note:** If you've previously connected to this network, the saved password will be used automatically.
### Connection Process
The device will display "Connecting..." while establishing the connection. This typically takes 5-10 seconds.
### Saving Credentials
If this is a new network, you'll be prompted to save the password:
- Select **Yes** to save credentials for automatic connection next time (NOTE: These are stored in plaintext on the device's SD card. Do not use this for sensitive networks.)
- Select **No** to connect without saving
---
## Step 3: Connection Success
Once connected, the screen will display:
- **Network name** (SSID)
- **IP Address** (e.g., `192.168.1.102`)
- **Web server URL** (e.g., `http://192.168.1.102/`)
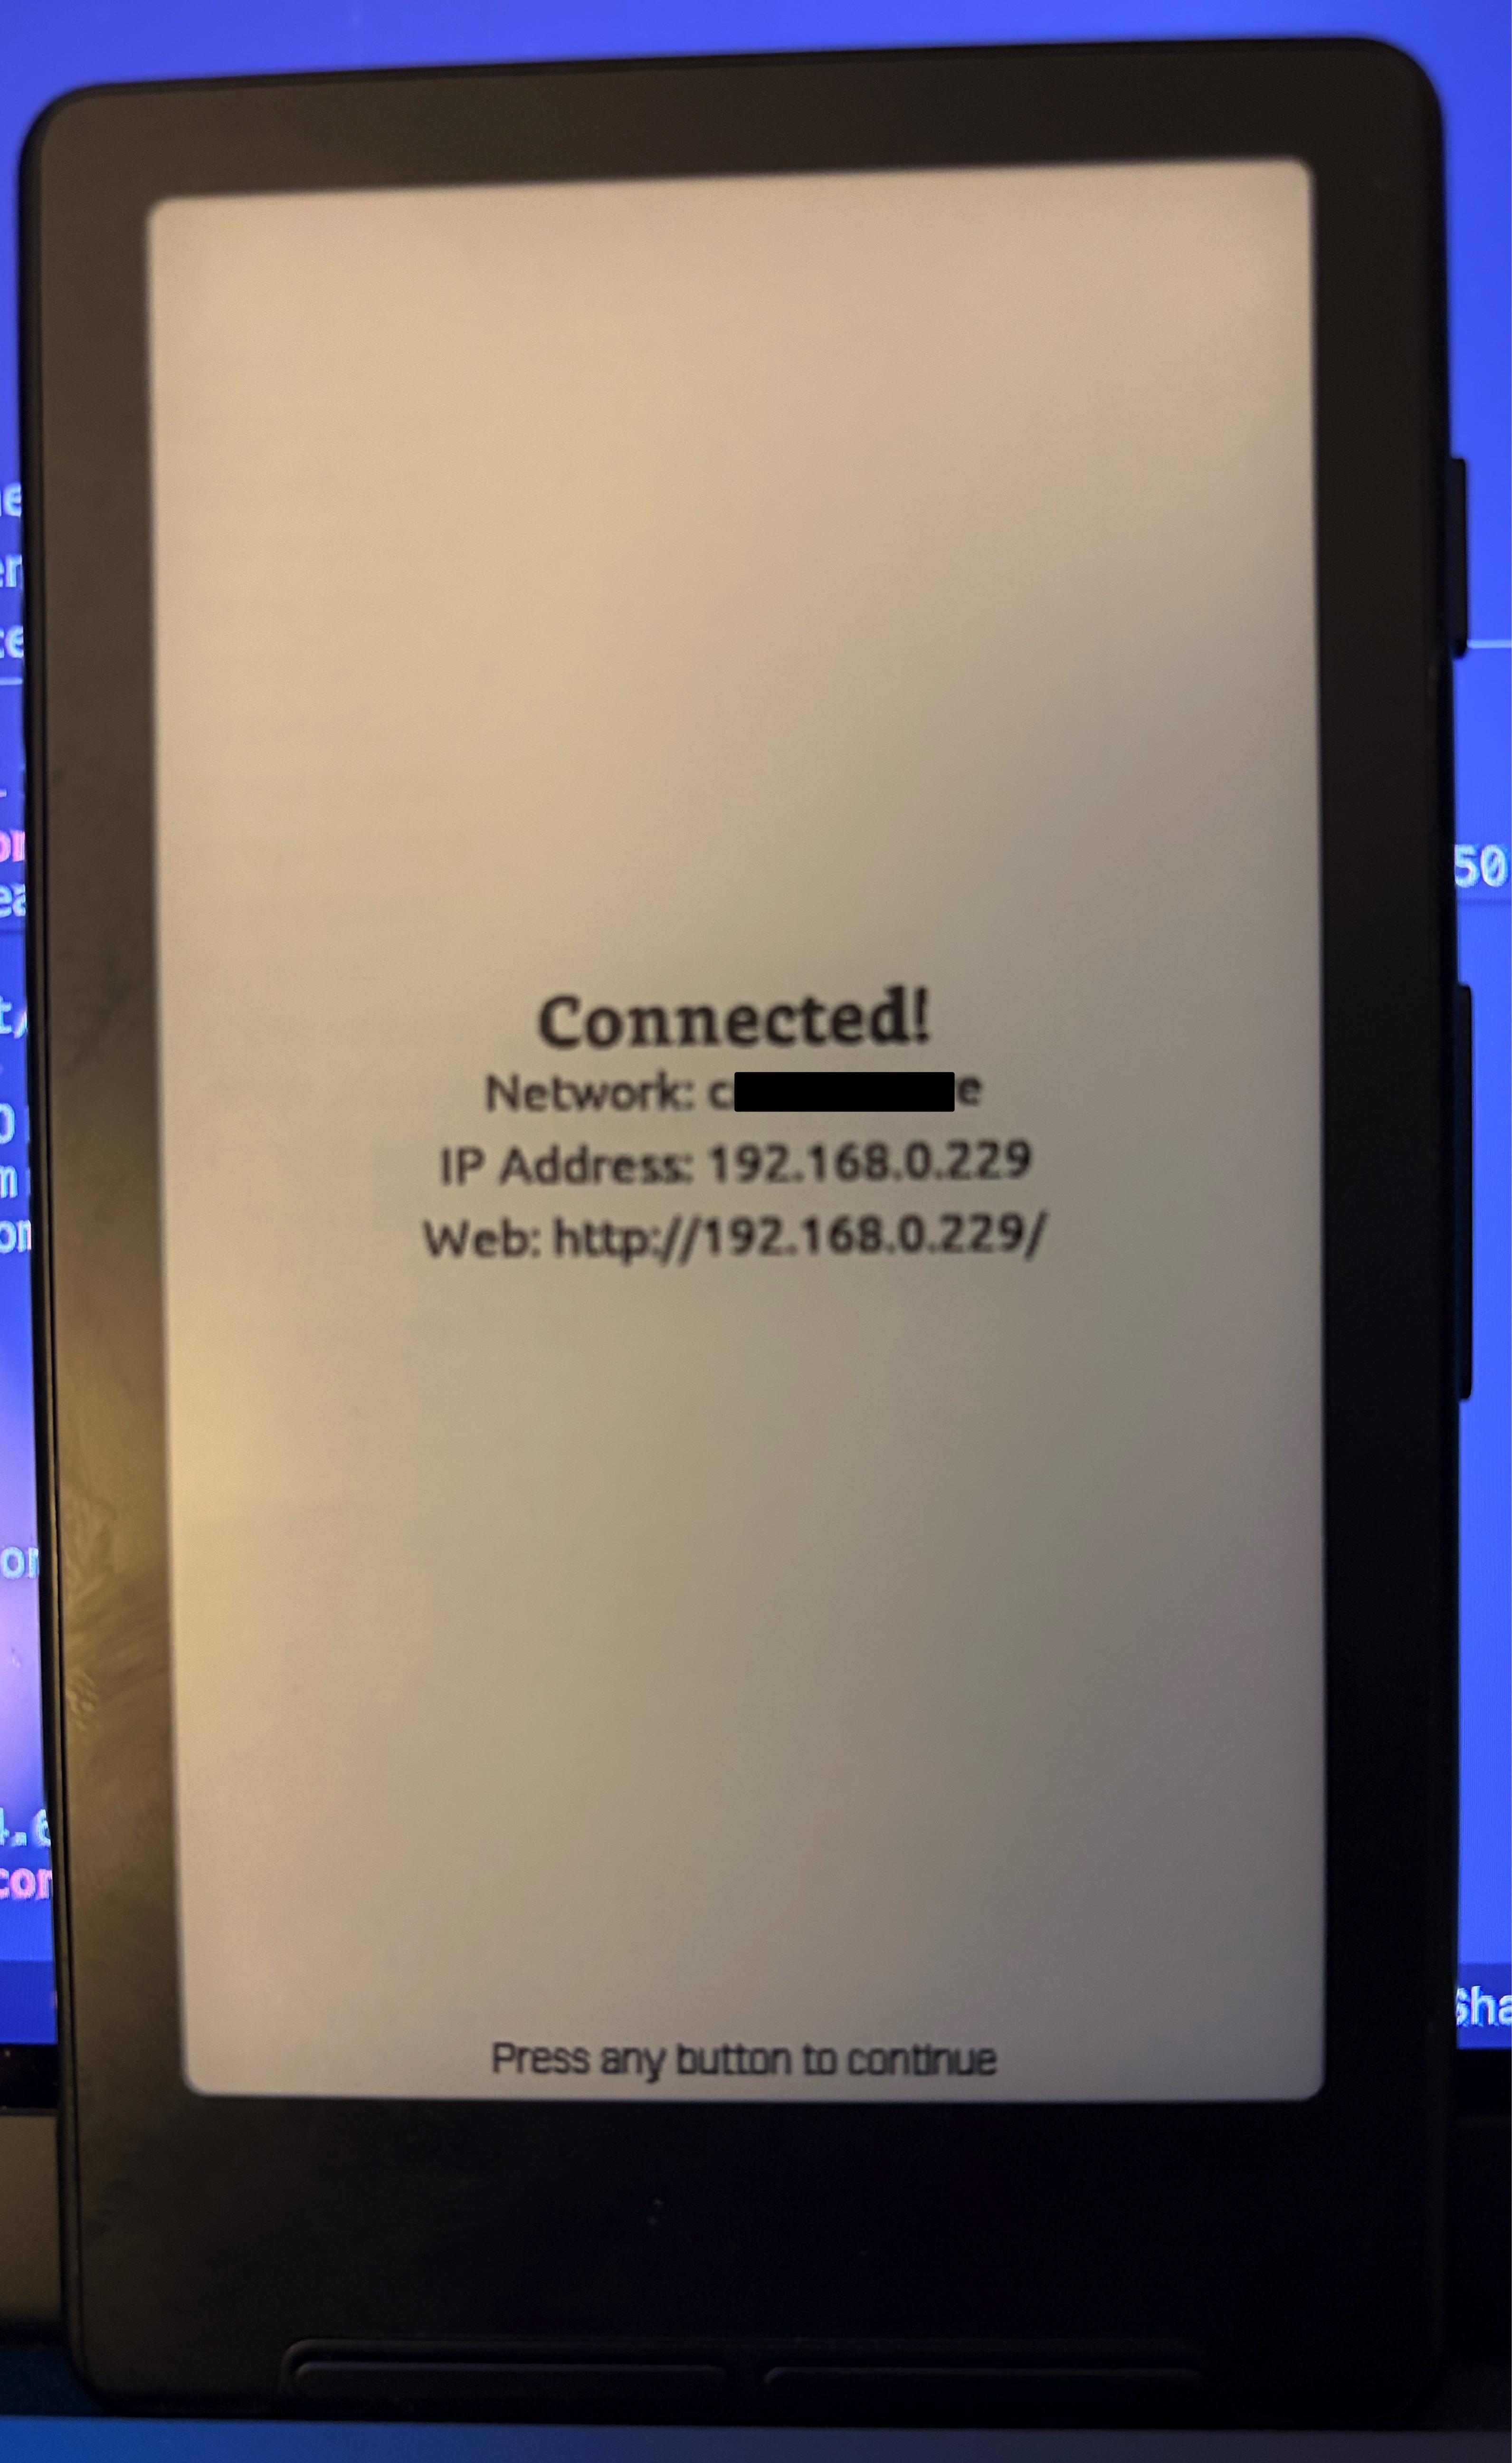 **Important:** Make note of the IP address - you'll need this to access the web interface from your computer or phone.
---
## Step 4: Accessing the Web Interface
### From a Computer
1. Ensure your computer is connected to the **same WiFi network** as your CrossPoint Reader
2. Open any web browser (Chrome is recommended)
3. Type the IP address shown on your device into the browser's address bar
- Example: `http://192.168.1.102/`
4. Press Enter
### From a Phone or Tablet
1. Ensure your phone/tablet is connected to the **same WiFi network** as your CrossPoint Reader
2. Open your mobile browser (Safari, Chrome, etc.)
3. Type the IP address into the address bar
- Example: `http://192.168.1.102/`
4. Tap Go
---
## Step 5: Using the Web Interface
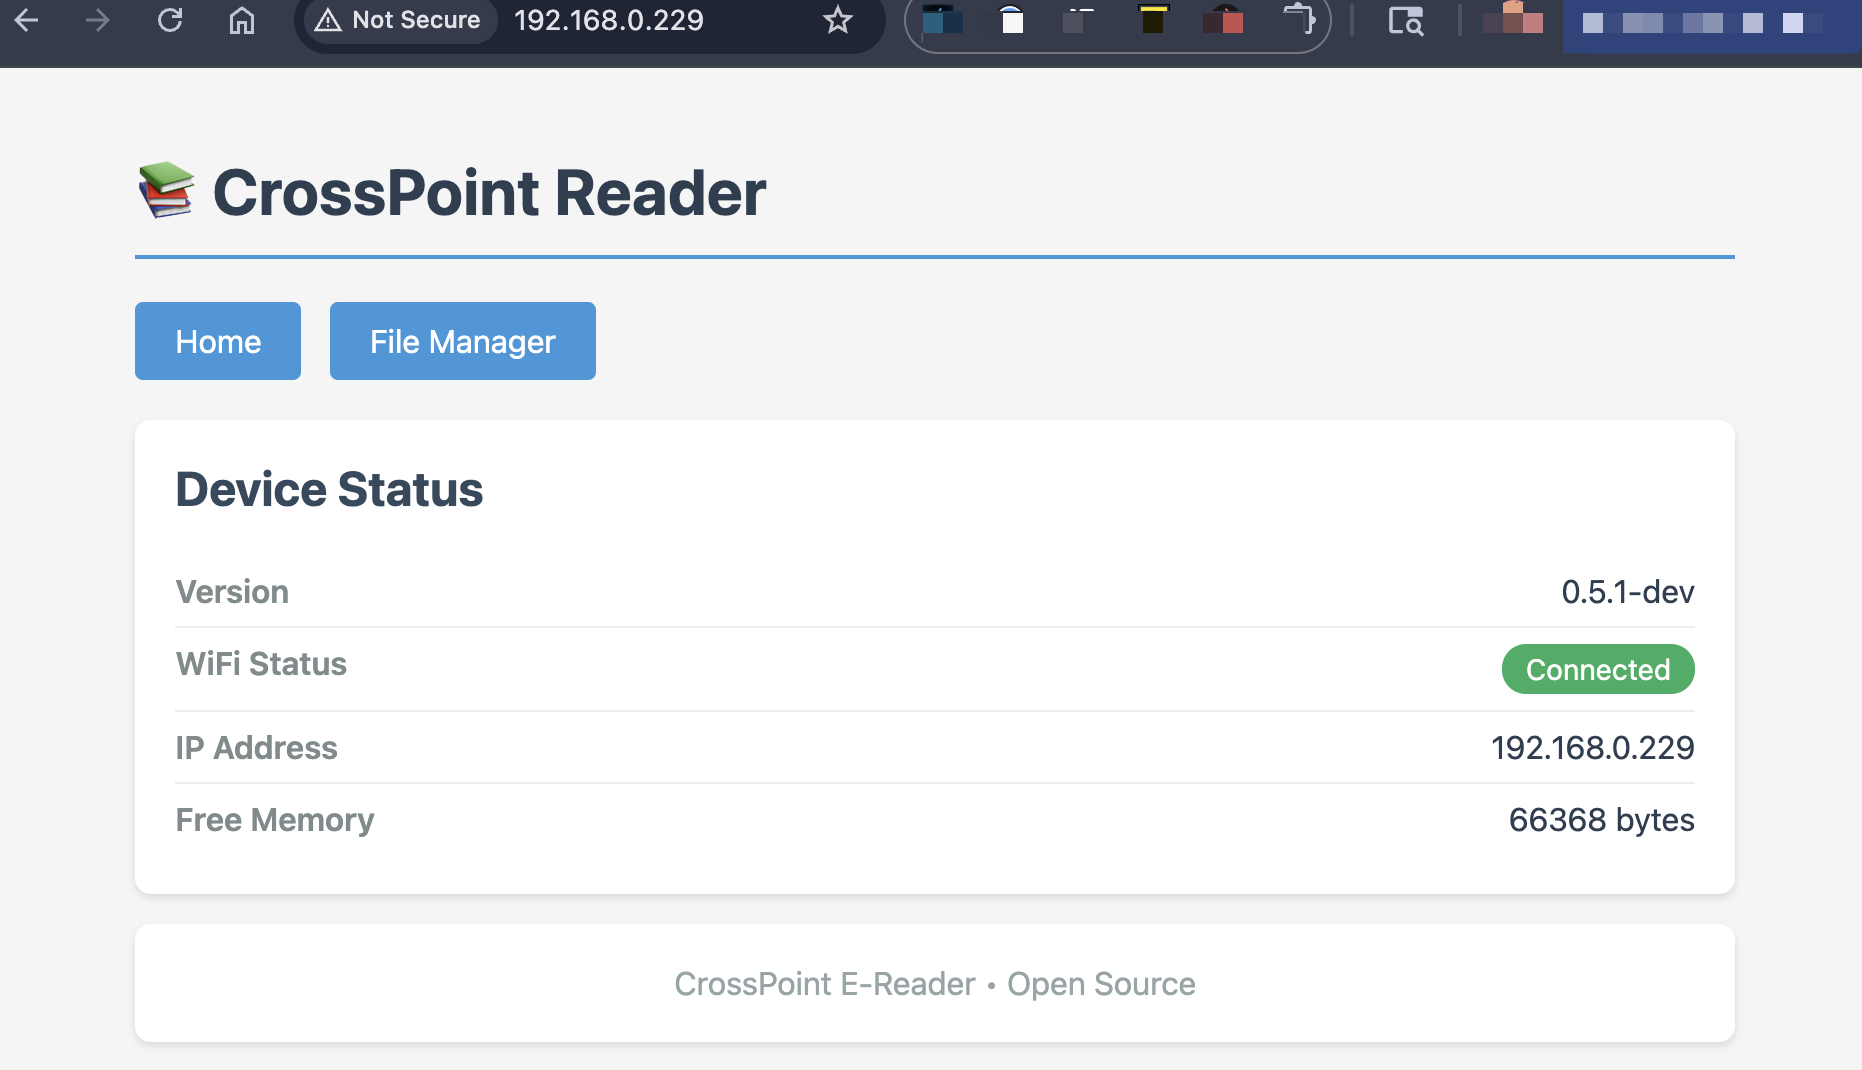
### Home Page
The home page displays:
- Device status and version information
- WiFi connection status
- Current IP address
- Available memory
Navigation links:
- **Home** - Returns to the status page
- **File Manager** - Access file management features
**Important:** Make note of the IP address - you'll need this to access the web interface from your computer or phone.
---
## Step 4: Accessing the Web Interface
### From a Computer
1. Ensure your computer is connected to the **same WiFi network** as your CrossPoint Reader
2. Open any web browser (Chrome is recommended)
3. Type the IP address shown on your device into the browser's address bar
- Example: `http://192.168.1.102/`
4. Press Enter
### From a Phone or Tablet
1. Ensure your phone/tablet is connected to the **same WiFi network** as your CrossPoint Reader
2. Open your mobile browser (Safari, Chrome, etc.)
3. Type the IP address into the address bar
- Example: `http://192.168.1.102/`
4. Tap Go
---
## Step 5: Using the Web Interface
### Home Page
The home page displays:
- Device status and version information
- WiFi connection status
- Current IP address
- Available memory
Navigation links:
- **Home** - Returns to the status page
- **File Manager** - Access file management features
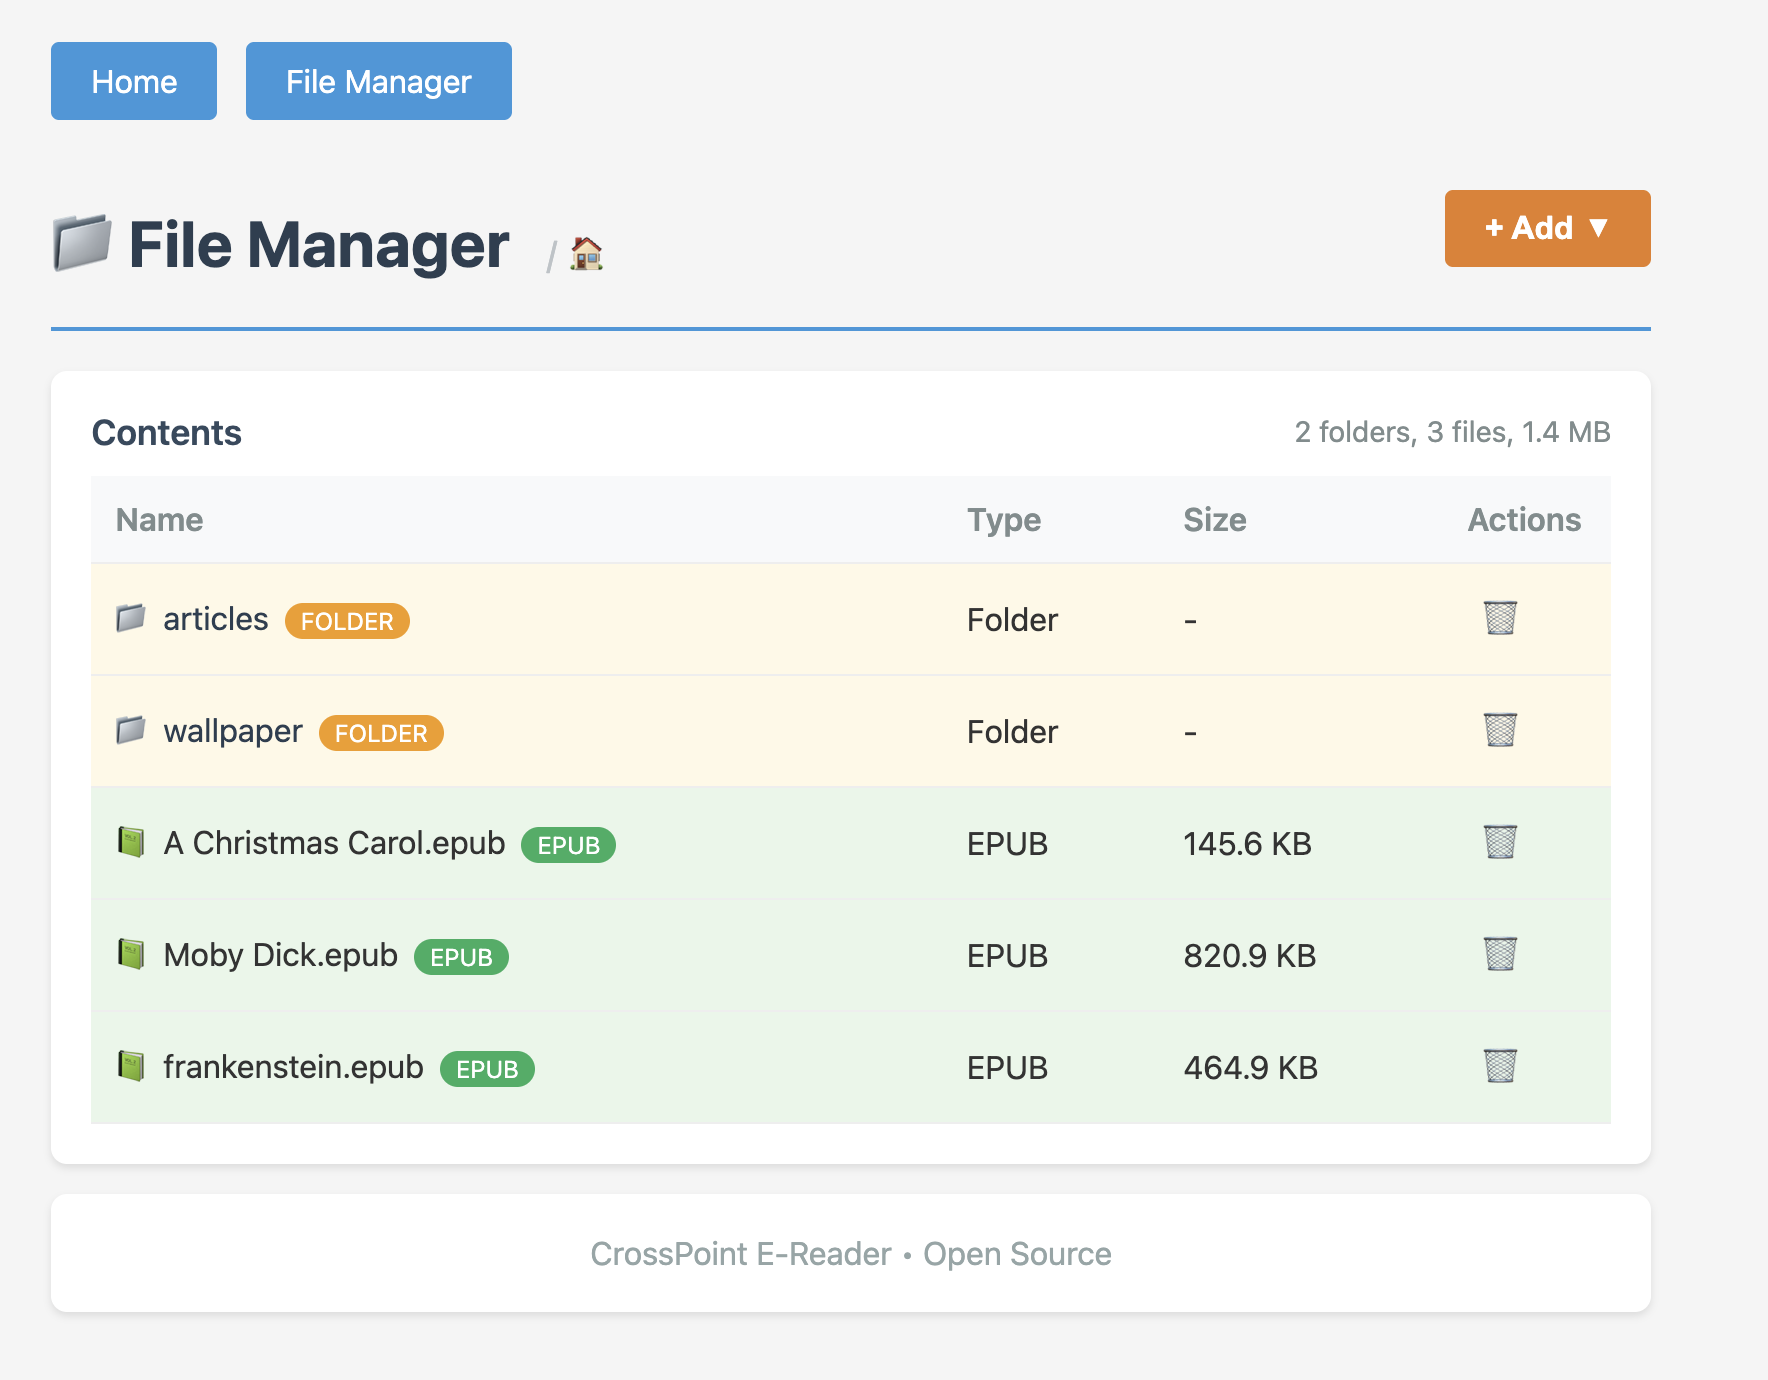
 ### File Manager
Click **File Manager** to access file management features.
#### Browsing Files
- The file manager displays all files and folders on your SD card
- **Folders** are highlighted in yellow with a 📁 icon
- **EPUB files** are highlighted in green with a 📗 icon
- Click on a folder name to navigate into it
- Use the breadcrumb navigation at the top to go back to parent folders
### File Manager
Click **File Manager** to access file management features.
#### Browsing Files
- The file manager displays all files and folders on your SD card
- **Folders** are highlighted in yellow with a 📁 icon
- **EPUB files** are highlighted in green with a 📗 icon
- Click on a folder name to navigate into it
- Use the breadcrumb navigation at the top to go back to parent folders
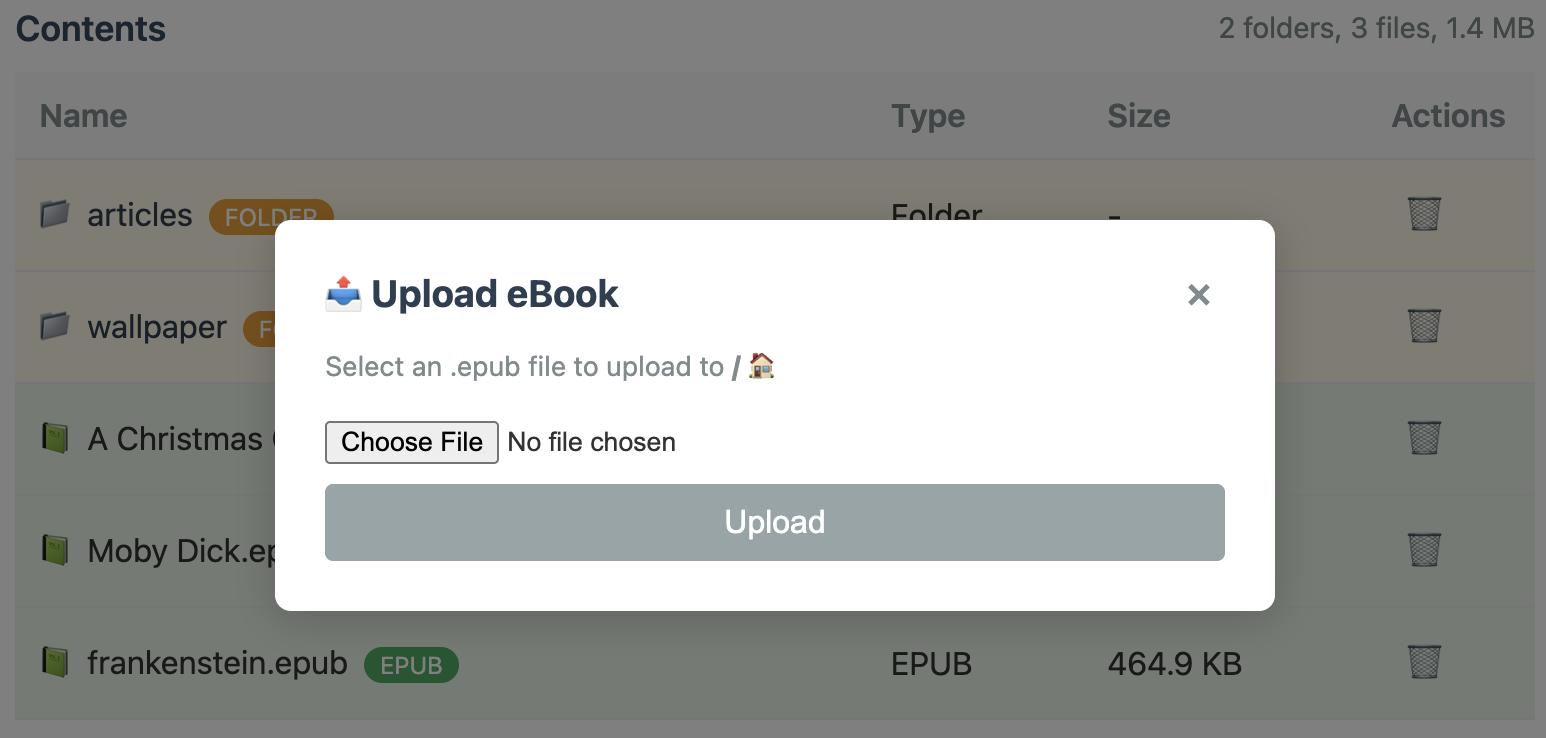
 #### Uploading EPUB Files
1. Click the **+ Add** button in the top-right corner
2. Select **Upload eBook** from the dropdown menu
3. Click **Choose File** and select an `.epub` file from your device
4. Click **Upload**
5. A progress bar will show the upload status
6. The page will automatically refresh when the upload is complete
**Note:** Only `.epub` files are accepted. Other file types will be rejected.
#### Uploading EPUB Files
1. Click the **+ Add** button in the top-right corner
2. Select **Upload eBook** from the dropdown menu
3. Click **Choose File** and select an `.epub` file from your device
4. Click **Upload**
5. A progress bar will show the upload status
6. The page will automatically refresh when the upload is complete
**Note:** Only `.epub` files are accepted. Other file types will be rejected.
 #### Creating Folders
1. Click the **+ Add** button in the top-right corner
2. Select **New Folder** from the dropdown menu
3. Enter a folder name (letters, numbers, underscores, and hyphens only)
4. Click **Create Folder**
This is useful for organizing your ebooks by genre, author, or series.
#### Deleting Files and Folders
1. Click the **🗑️** (trash) icon next to any file or folder
2. Confirm the deletion in the popup dialog
3. Click **Delete** to permanently remove the item
**Warning:** Deletion is permanent and cannot be undone!
**Note:** Folders must be empty before they can be deleted.
---
## Troubleshooting
### Cannot See the Device on the Network
**Problem:** Browser shows "Cannot connect" or "Site can't be reached"
**Solutions:**
1. Verify both devices are on the **same WiFi network**
- Check your computer/phone WiFi settings
- Confirm the CrossPoint Reader shows "Connected" status
2. Double-check the IP address
- Make sure you typed it correctly
- Include `http://` at the beginning
3. Try disabling VPN if you're using one
4. Some networks have "client isolation" enabled - check with your network administrator
### Connection Drops or Times Out
**Problem:** WiFi connection is unstable
**Solutions:**
1. Move closer to the WiFi router
2. Check signal strength on the device (should be at least `||` or better)
3. Avoid interference from other devices
4. Try a different WiFi network if available
### Upload Fails
**Problem:** File upload doesn't complete or shows an error
**Solutions:**
1. Ensure the file is a valid `.epub` file
2. Check that the SD card has enough free space
3. Try uploading a smaller file first to test
4. Refresh the browser page and try again
### Saved Password Not Working
**Problem:** Device fails to connect with saved credentials
**Solutions:**
1. When connection fails, you'll be prompted to "Forget Network"
2. Select **Yes** to remove the saved password
3. Reconnect and enter the password again
4. Choose to save the new password
---
## Security Notes
- The web server runs on port 80 (standard HTTP)
- **No authentication is required** - anyone on the same network can access the interface
- The web server is only accessible while the WiFi screen shows "Connected"
- The web server automatically stops when you exit the WiFi screen
- For security, only use on trusted private networks
---
## Technical Details
- **Supported WiFi:** 2.4GHz networks (802.11 b/g/n)
- **Web Server Port:** 80 (HTTP)
- **Maximum Upload Size:** Limited by available SD card space
- **Supported File Format:** `.epub` only
- **Browser Compatibility:** All modern browsers (Chrome, Firefox, Safari, Edge)
---
## Tips and Best Practices
1. **Organize with folders** - Create folders before uploading to keep your library organized
2. **Check signal strength** - Stronger signals (`|||` or `||||`) provide faster, more reliable uploads
3. **Upload multiple files** - You can upload files one at a time; the page refreshes after each upload
4. **Use descriptive names** - Name your folders clearly (e.g., "SciFi", "Mystery", "Non-Fiction")
5. **Keep credentials saved** - Save your WiFi password for quick reconnection in the future
6. **Exit when done** - Press **Back** to exit the WiFi screen and save battery
---
## Exiting WiFi Mode
When you're finished uploading files:
1. Press the **Back** button on your CrossPoint Reader
2. The web server will automatically stop
3. WiFi will disconnect to conserve battery
4. You'll return to the previous screen
Your uploaded files will be immediately available in the file browser!
---
## Related Documentation
- [User Guide](../USER_GUIDE.md) - General device operation
- [README](../README.md) - Project overview and features
#### Creating Folders
1. Click the **+ Add** button in the top-right corner
2. Select **New Folder** from the dropdown menu
3. Enter a folder name (letters, numbers, underscores, and hyphens only)
4. Click **Create Folder**
This is useful for organizing your ebooks by genre, author, or series.
#### Deleting Files and Folders
1. Click the **🗑️** (trash) icon next to any file or folder
2. Confirm the deletion in the popup dialog
3. Click **Delete** to permanently remove the item
**Warning:** Deletion is permanent and cannot be undone!
**Note:** Folders must be empty before they can be deleted.
---
## Troubleshooting
### Cannot See the Device on the Network
**Problem:** Browser shows "Cannot connect" or "Site can't be reached"
**Solutions:**
1. Verify both devices are on the **same WiFi network**
- Check your computer/phone WiFi settings
- Confirm the CrossPoint Reader shows "Connected" status
2. Double-check the IP address
- Make sure you typed it correctly
- Include `http://` at the beginning
3. Try disabling VPN if you're using one
4. Some networks have "client isolation" enabled - check with your network administrator
### Connection Drops or Times Out
**Problem:** WiFi connection is unstable
**Solutions:**
1. Move closer to the WiFi router
2. Check signal strength on the device (should be at least `||` or better)
3. Avoid interference from other devices
4. Try a different WiFi network if available
### Upload Fails
**Problem:** File upload doesn't complete or shows an error
**Solutions:**
1. Ensure the file is a valid `.epub` file
2. Check that the SD card has enough free space
3. Try uploading a smaller file first to test
4. Refresh the browser page and try again
### Saved Password Not Working
**Problem:** Device fails to connect with saved credentials
**Solutions:**
1. When connection fails, you'll be prompted to "Forget Network"
2. Select **Yes** to remove the saved password
3. Reconnect and enter the password again
4. Choose to save the new password
---
## Security Notes
- The web server runs on port 80 (standard HTTP)
- **No authentication is required** - anyone on the same network can access the interface
- The web server is only accessible while the WiFi screen shows "Connected"
- The web server automatically stops when you exit the WiFi screen
- For security, only use on trusted private networks
---
## Technical Details
- **Supported WiFi:** 2.4GHz networks (802.11 b/g/n)
- **Web Server Port:** 80 (HTTP)
- **Maximum Upload Size:** Limited by available SD card space
- **Supported File Format:** `.epub` only
- **Browser Compatibility:** All modern browsers (Chrome, Firefox, Safari, Edge)
---
## Tips and Best Practices
1. **Organize with folders** - Create folders before uploading to keep your library organized
2. **Check signal strength** - Stronger signals (`|||` or `||||`) provide faster, more reliable uploads
3. **Upload multiple files** - You can upload files one at a time; the page refreshes after each upload
4. **Use descriptive names** - Name your folders clearly (e.g., "SciFi", "Mystery", "Non-Fiction")
5. **Keep credentials saved** - Save your WiFi password for quick reconnection in the future
6. **Exit when done** - Press **Back** to exit the WiFi screen and save battery
---
## Exiting WiFi Mode
When you're finished uploading files:
1. Press the **Back** button on your CrossPoint Reader
2. The web server will automatically stop
3. WiFi will disconnect to conserve battery
4. You'll return to the previous screen
Your uploaded files will be immediately available in the file browser!
---
## Related Documentation
- [User Guide](../USER_GUIDE.md) - General device operation
- [README](../README.md) - Project overview and features